
Top End Rebuild on my 2020 Beta 300
After a tough season and half of racing, my 2020 Beta 300RR Race Edition is due for a top end. Being my first time tearing into the Beta motor (I've only done KTM's) I wanted to capture some of the details and surprises I encountered in the process.
After removing the gas tank, exhaust pipe, plastics, ect..., the first step was to remove the powervalve covers.

Yikes, there is some oil in here.
I found to my surprise that the cover on the right side (as you sit on the bike) had a tamper-proof screw. I used a screwdriver to break the tab off so I could use a regular allen HEX bit.
There was a pin in the center of the HEX screw that I broke off.
The process of disconnecting the power valve arm is the same as a KTM.
I then began loosening the head bolts up. This is when I really hit a snag. One of the head bolts was a tamper proof 6mm HEX bolt. Of course this was a tool I did not have and halted the entire process.

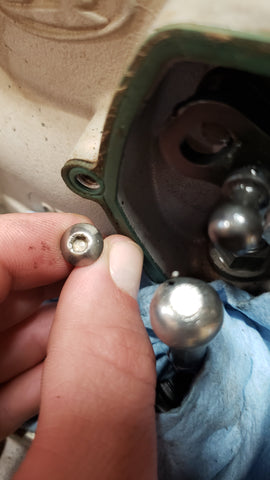
6mm HEX with the inside of the bit hollowed.
After sourcing the tool I was able to get the last head bolt out. Annoying! Apparently the reason for this is due to a European emissions law. Hey, if Beta has to do this for compliance so they can produce these motorcycles, I'll deal with a little inconvenience.
With the head and jug off I got my first look at how the piston looks.

|
 |
There was some grime, oil and carbon to clean up. It took some work and elbow grease.

The powervalve design on the Beta is interesting and much different than the KTM. I actually think it is a more robust and better design. The KTM's exhaust flange is parted so that the cover holds the powervalve assembly in. This requires the parted halves to match perfectly (the exhaust flange is specially fitted so it matches the cylinder). If you crack your exhaust flange you're left looking for the proper flange that matches your specific cylinder.

KTM 300 with Exhaust Flange Cover Removed.
On the Beta, the assembly is simply some pins that hold the powevalve in place. There are retaining screws that once removed allow you pull the pins, bearings and the "booster valves" out. The other nice thing is the movement of the powervalve is very smooth because the pins are on bearings.

Beta Power Valve Assembly
After a thorough cleaning of the powervalve components, I moved to inspect and clean the head. I was surprised to see a sharp burr on the edge of the coolant ports. I took a diamond file and removed the burrs on these edges.
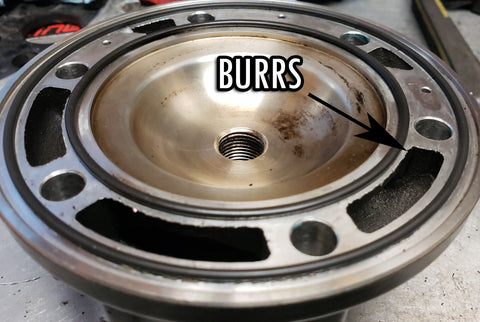

I used a diamond file to break the edge.
After cleaning, I re-assembled everything with a new piston, rings, wrist pin bearing, and gaskets. Overall the rebuild process on the Beta is similar to KTM's with the differences mainly being in the powervalve assembly. She's ready to rip!
Hey there Zach they say, Please check which size kit you need by removing the power valve cover on the left side of the cylinder (you’ll find the size designation on the cylinder inside that chamber). Sitting on the bike is that the right or left side?